DIY Picture Shelf


As promised I’m back to show you my first project build using my new Miter Saw. I tackled something easy for my first try plus it was something I’ve wanted to make for quite some time, a picture shelf. I just don’t have the knack for getting a groupe of photos positioned right on the wall so this method takes all the guesswork out of how to hang artwork.

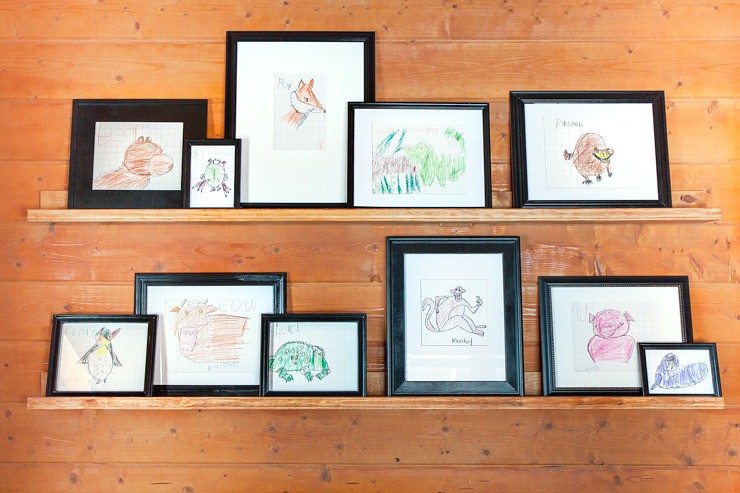
Here is the before photo and since then I’ve painted all the frames black, which I like by the way, and placing them on the shelf is a no brainer. My son did all the artwork when he was 7, and he’s now 21. It’s really a great way to show off his work and it makes me happy every time I see it.

The picture shelf is in my office; it’s where I spend most of my day so I get great joy from having the having the colorful pieces to look at. Don’t you agree the black frames give it a more polished look?

It’s so simple to arrange I started with the tallest frames in the back and layered the medium size frames next, and then added the smallest frames in front of the others. I had such fun arranging the shelves and can potential for other things to display. I also like the idea of pounding no nails and trying to get the frames level. I wish I had done this a long time ago.

The circular black chair isn’t attractive but it’s so comfy to sit in while watching a movie (The computer is my DVD player) so to fancy it up a little I added a warm throw and a couple of pillows and a room always feels alive with fresh flowers. Our local grocery sells a big variety and this whole bouquet was only $3, I couldn’t pass them up.

Black Chair: Target, Bird Pillow Cover: Pottery Barn, Animal Print Pillow: Made by Me. Now on to what you’ll need to make this easy DIY Picture Shelf.

(2) 1X4 in desired length
(1) 1.5” trim molding in desired style.
Cut, glue, and nail to look like the photo above.
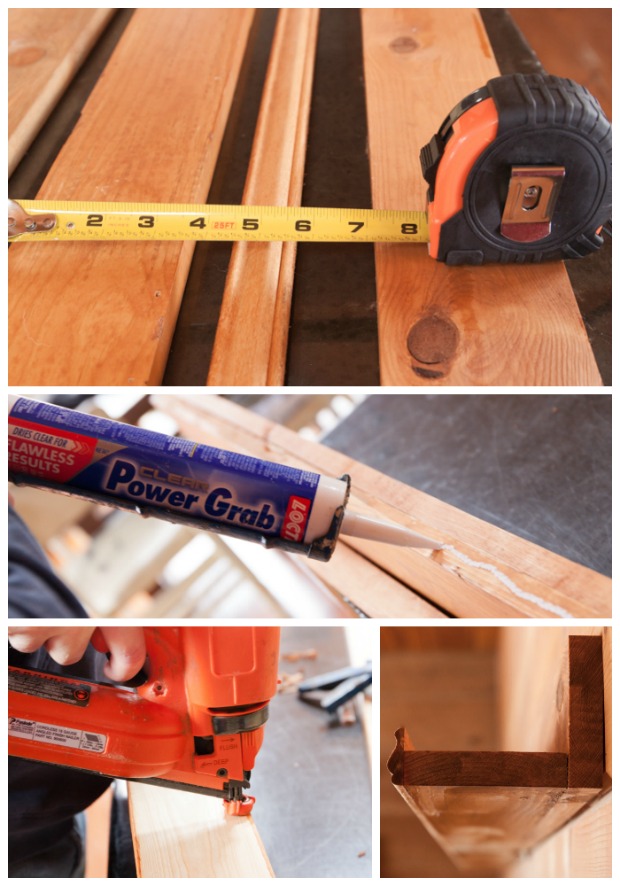
Tip: If you purchase the board in standard sizes you can just assemble with no cutting involved. I made an odd length, 7ft so I had cuts.

Creative Cain Cabin is a participant in the Amazon Services LLC Associates Program, an affiliate advertising program designed to provide a means for sites to earn advertising fees by advertising and linking to Amazon.com


You hit your first project out of the park Dawn!!!!….I love the concept of picture shelves….less holes in the wall!!!….and also love your “bird pillow”….that pattern is currently my bedding in the master bedroom now….I love it…and I love the animal print pillow you made…it is beautiful with it!!!
Shirley Im so mad at myself somehow when I placed my order for the pillow covers I only ordered one and now they’re not available anymore 🙁
Great first project!
I like the shelf idea. Since we live in an art gallery, paintings are forever changing. I think we need to go with the shelves when we paint the living room so we don’t end up with hundreds of holes.
Carol that is a good solution. I didn’t want tons of nails because there’s no way to repair them on this type of walls and those 3M things just don’t work.
Very cool, Dawn! A perfect solution to your wall art dilemma. I am proud of you that you did this shelving yourself. Xox
Diana I love that I don’t have to pound nails and make a mess of the wall now.
Such joy to look at your son’s art work on the shelves you made. Love it!
Kathleen in Az
Kathleen he thinks they’re horrible but I love them 🙂
Looks great Dawn. We have picture shelves in our hallway, a great place to display photos that we don’t want damaged by the sun and light.
Linda I’d never thought of sunlight good point. Im glad mine are out of the sun too.
What an adorable way to display the kids art!
Stephanie you’re right and it’s so easy to change out at anytime.
Very nice job Dawn! You have some wonderful ‘little guy’ mementos to cherish!
Susan I will always treasure all his artwork.