Concrete Counter Tops on a Budget


Excuse the horrible photos taken with a phone.
“This Is How We Made Our Concrete Counter Tops“
First we formed the counter top out of plywood. The plywood will stay under the concrete forever. This is a pour in place method.Tape off all the cupboards underneath with plastic. This is a very messy job, and since we had the concrete company add black dye to the mix, it may stain the cabinets.
Pour the concrete into the plywood frame. We had the concrete truck pull up to our front door, and we used a 5 gallon bucket to transport the concrete into the house. (At this point we only had plywood floors and didn’t have to worry about the mess. Just wait for the concrete to dry and sweep it up.) It took about 30 minutes to have it all in the frame.
Hubby used his concrete tools to smooth the top of the concrete (who wants a bumpy counter top) and a vibrating tool to get any air bubbles worked out. Vibrating is a must. When the forms are removed from the edges you don’t want a honeycomb effect, you want a solid edge, and vibrating ensures that.

This is where the waiting game starts. Everything is smooth and looks great. Now we are patiently waiting for it to set up enough to pull the forms from the edges so they can be tooled, and made smooth.

Concrete is dry and all the form and plastic are removed. At this point we wet sanded all the surfaces.
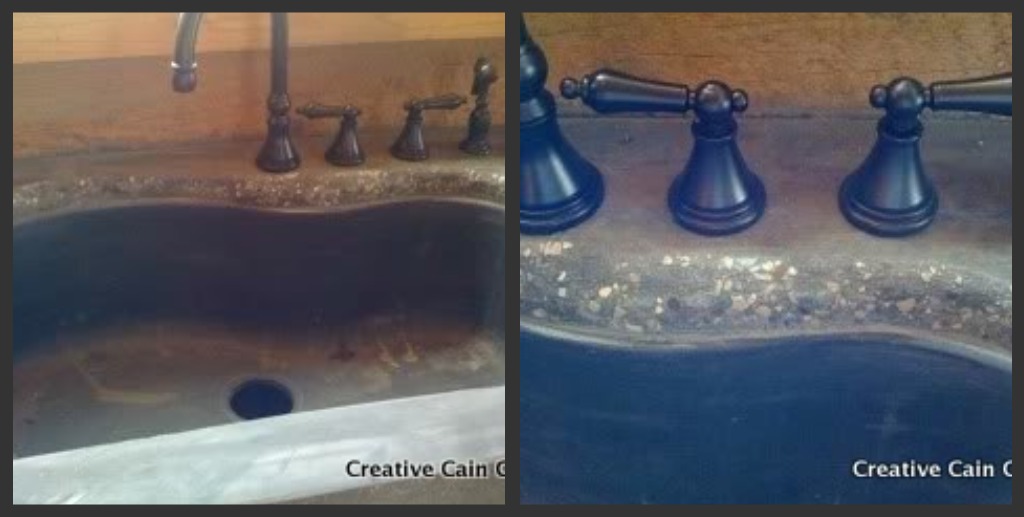
Here the edge of the sink was sanded to expose the stone.

Wait 30 days for the concrete to completely cure. Again tape off the cupboards and apply the sealer. We used a roller to apply it and a heat gun to remove any air bubbles.
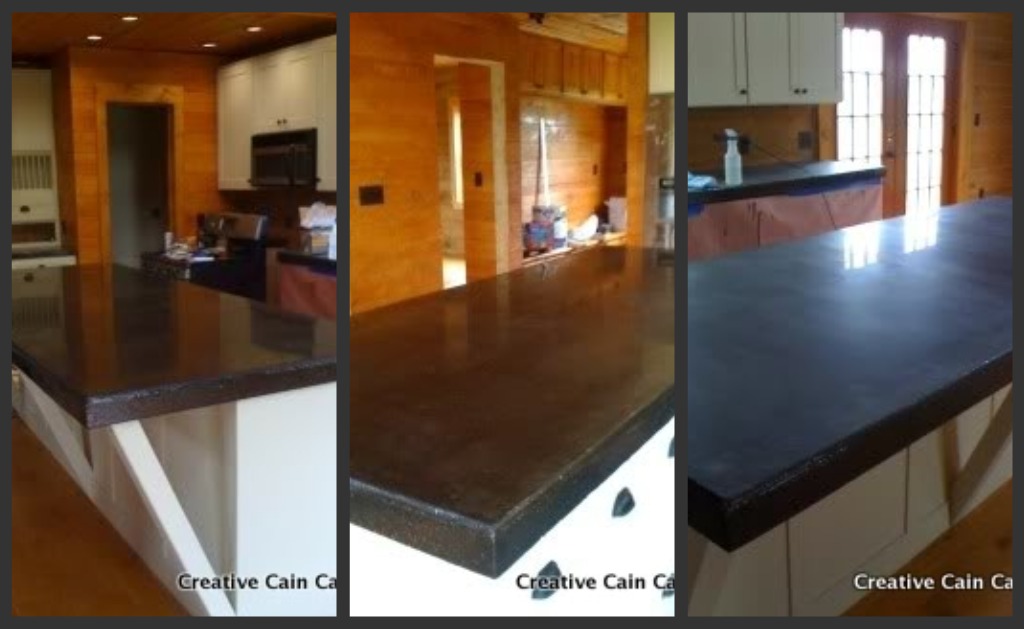
Once again we wet sanded the sealer to take away some of the shine. It was like a looking glass before the sanding. The look we wanted to achieve was more of a matte finish.
There you have it, how we saved big bucks. This project cost $400.00. (This would have been a $7,000.00 project to have them precast.) Good thing I have a talented, hard working hubby.


I would say hubby is talented! Wow they look great, and what a great cost for such beauties, you lucky girl!
Those look so good especially after the sealer was added. Great job.
I have always loved concrete counters, yours turned out fantastic! I’ll have to show my sister this post, she’s been wanting concrete too! Great job!
Dee Dee
Wow, what a job but such savings! Beautiful job on it!
OOOO! Nice! I’m impressed!
You are lucky to have the handy husband…my husband has many talents but being handy isn’t one of them! I hate hiring things out but sometimes there’s just no choice. Your countertops are incredible as is that sink and the faucets. All great choices. Have a good week!
That looks fantastic Dawn and the price sure is worth the effort. You are very lucky to have such a handy dandy husband to help you make your home a show stopper. Happy New Year.
I have always like concrete counters. Yours are so pretty; I love the dark against your white cabinets!
Take care and stay warm!
Jodi
They look absolutely gorgeous, Dawn! Hope the new year is starting off wonderfully for you!
xoxo, CAS
very neat, you guys did a great job, I kind of wish I had looked a little more into that myself
AMAZING! Thank you so much for sharing. It is so exciting to know how little this cost but how fabulous they turned out! This gives me hope for my poor kitchen which needs new countertops desperately, but surely can’t afford it!~Jan
They are FABULOUS!!! Oh how I wish my hubby liked to do that sort of thing. The two of us would be unstoppable!!! We have friends who poured their own concrete countertops and they are wonderful. Yours are beautiful!!!
Those counters are gorgeous. And I can believe how inexpensive they were. Very high-end looking! Can’t wait to see more pics.
They look great! Thanks for sharing!
Congrats to you and your husband on a job well done! These counters look fabulous. Well done. :-)!
I love the look and the price! That would totally take care of my problem in my kitchen. Now I just need to borrow you hubby! 😉
That is insanely awesome…WOW
amazing ! I wish my Mr G could do something like this …MY kitchen counters are cheapy-creepy …Im so liking this concrete
– KAT –
I love the look of the concrete. I have thought about them, but I was wondering about the weight. Are they heavier than granite or marble? Thanks!
Wow, that’s great! I’d never seen the how-to on pour in place tops! I just love how they turned out. Thanks for sharing!
I LOVE your style!!! I totally want you to stop by and join my link party that just opened!!!
XO, Aimee
These look beautiful…kudos to your hubby!!! I’m sure the process is much more complicated than it looks!!!
I have already seen this post. Loved it the first time too. You are partying right after me at funky junk.
All your husband’s work was well worth it because your counters are gorgeous! If we ever build another house, we’re going with concrete countertops. You can’t beat the frugality of them and yours, with the black dye, look just like soapstone (at a fraction of the cost!)
OMGosh! That is absolutely beautiful! You guys did a fantastic job! Thank you for sharing. Hope you have a grand evening. Toodles, Kathryn @TheDedicatedHouse
I love this, y’all have done such a great job! We are doing the same in our reno house, but we live there, so what should we do about the curing process? Thanks for any tips
I hope it is not too late to ask a question on your concrete countertops. We are about to do our own pour for a 39square foot island and wanted to do an “on site” pour. You mentioned the plywood stays there, how does it not show after the concrete has been poured? maybe I’m missing something. Thank you!! they are absolutely beautiful! -Mary