DIY Photography Backdrop Stand {No Tools Required}


 Today I want to share with you how I made my own DIY PHOTOGRAPHY BACKDROP STAND without any tools. I know hubby would have constructed one for me but I had a light bulb moment and said I can easily turn that old ADJUSTABLE GARMENT RACK into a stand and won’t have to wait. I’m so impressed when one of my brilliant ideas comes together and actually works.
 So here’s what I did:
- From my existing RACK I removed the rod from the top and the two from the bottom and replaced them with 6ft dowels from the hardware store. I wanted the rack to extend wider so this was an easy and inexpensive way to do it. (If you don’t want to go to the trouble of replacing the rods I have a link below for a RACK that extends wider and the above step can be skipped). I was just looking to use what I had on hand without purchasing something new. TIP: take the top and bottom rod with you to the hardware so you get the right size, they all look the same once you get there.
- Find a CARDBOARD TUBE as wide or wider than your BACKDROP MATERIAL and tape one end to the tube, roll up the backdrop, and slide the cardboard tube over the top dowel or rod. (I used a cardboard tube from a decorator fabric bolt, you could also use the tube from a roll of wrapping paper, or a MAILING TUBE). I tend to use what I have so look around your house before buying anything. I bet you can get creative and come up with something.
- Voila’ in less than 5 minutes I have a ready made DIY PHOTOGRAPHY BACKDROP STAND. I really love the idea of it being on wheels so I can roll it around to where I need it.
 You can either keep a card table nearby to use as your surface or do like I do and use my dining room table; one less item to store that way. I can either use the table as my surface color or roll the backdrop over the table and use that. All I have to do when I’m done taking photos is roll the backdrop up and push the whole rack into my office for safekeeping. I do like the idea that’s it’s all very easy to take apart and move to an off site location if need be. I could use it for portrait photography on the go easily.

Easy enough to make, right? Below I have a list of materials I used in making this project. You can find them all at Amazon and if you purchase through the link I will earn a small fee.

MATERIAL LIST
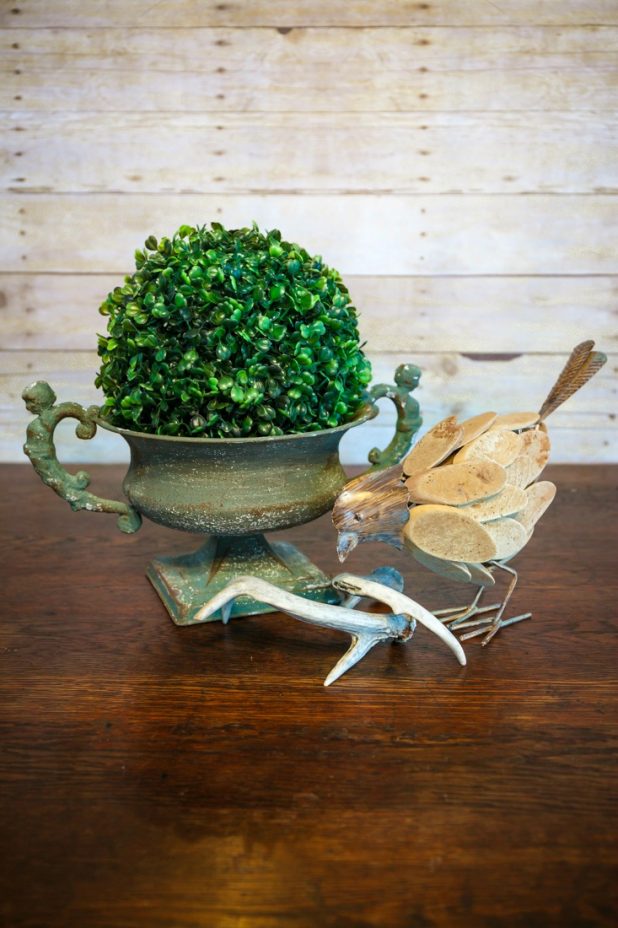
WHITE WASHED WOOD PHOTOGRAPHY BACKDROP
ADJUSTABLE GARMENT RACK {NO DOWELS REQUIRED}


Dawn… this was genius!
Diane I have good idea every now and again and I agree this was a good one, lol 🙂
Fantastic idea!
Lani thank you 🙂
Love this! Thank you for sharing! Your pics are always beautiful!
Thank you Tammy and the backdrop makes it so much easier to do photos. It’s hard with my dark log walls sometimes.
Brilliant idea Dawn! I absolutely love it.
Thanks Debbie and it’s easy too.
Absolutely brilliant!!!!
Thank you Vanessa, once in awhile I have a good idea. LOL But they’re few and far between.
Dawn, I had no idea that the printed backgrounds were available on Amazon! Thanks for providing your link, and I will definitely use it to order a background! And I will be looking for a garment rack or something similar. Sure wish I still had my chart stand that I used in my classroom because it would work for this as well. You are a genius and I would love to see more tips like this!
Jane yes a chart stand would have worked out brilliantly. I bet Leo has something you can use.
What a great idea Dawn….I have a roll of wood plank design paper that I was going to adhere to foam core…but I love this idea!
Love those light bulb moments!
Shirley your idea is a great one too. I say do whatever works best for you 🙂
Darn clever Dawn. Love the wood look.
Debbie I like that it’s white on the other side so I can get two looks from one backdrop.
I have nothing new to add – just echoing the genius of the whole thing!
Thank you Tammy 🙂
Perfect! I can’t wait to do one now! Got that old rack in storage. The storage unit slated to be cleaned out this month. This month or bust! 🙂
Wanda what perfect timing. Good for you on the cleaning project and it’s always nice to find something stored in there that’s useful and can be recycled into a new project.
I love this, thanks for sharing on the Bloggertunities FB page! I’ve got the rack, thanks for the link to the backdrop, it’ll be my next project 🙂
Molly thank you so much for stopping in and commenting. I hope you enjoy yours as much as I do mine 🙂
Wow! that is genius. I love your backdrop, and it’s neat that it rolls.
Kim rolling is the best part, makes it so easy to get around.
Such a wonderful idea! I got a backdrop for Christmas and wasn’t sure how I would go about setting it up. Thank you!
Amy you will love having a backdrop, lucky you to get one for Christmas!
What a great idea!
Thank you Carol 🙂
How cleaver Dawn !….Thank you for the ideas and great tips.
Cheryl you are so welcome.
Wow! That was awesome!
Thank you Cheska 🙂
I ♥ all of your clever little tips! Thank you Ü
Holly, you are welcome. I love this one because it’s so inexpensive.
I must tell you I had become quite discouraged as a newer business. The biggest part is how you present your product. As I don’t have a large living space at this moment I simply couldn’t figure out what to do. Then I found this pure genius article! Everything is set up and ready to go. Thank you for sharing sweet lady.
Molly
I love your idea! I do have one question though, does the rack have to be an expanding one? How wide are the backgrounds to fit on an existing rack? What is the width that the rack should be for this to work?